 Now that we have our supplies, started singing, and amassing lyric pdfs to songs we want to learn, lets dive into systematically learning some chords. Guitar Chords There are tons of Youtube videos about learning guitar chords. Start watching them and collecting metadata on the topic. Start by learning A, B, C, D, E, F, and G (to be referred to as “A-G” in other examples) major chords in “cowboy” chord voicings. Cowboy voicings are the basic chord shapes that are formed in the first three fret blocks. Search Guitar “cowboy guitar chords major”. My exception to the “first three fret blocks” rule will be the F and B major chord. Again, there are many sources for learning these two semi-problematic chords on the Internet – do some research. My formula for success is based on realistic time management “one part watch, nine parts play with the instrument in your hands”. Your research will show that there are different ways to approach those the chords but I am going to make a suggestion on how YOU should initially approach them. 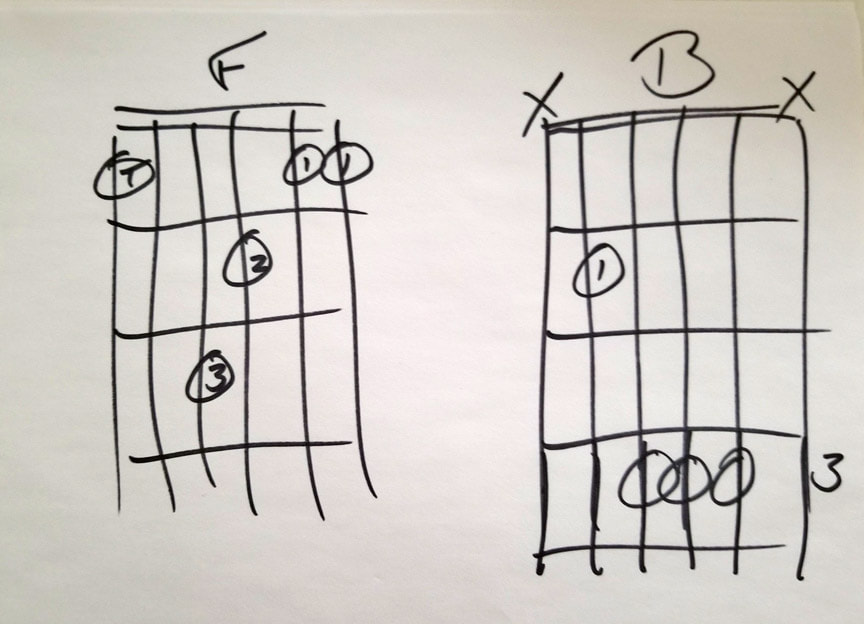 The F Major Chord
The basics: Barre the two thinnest strings (E and B) with your index (1) finger. If you can wrap your thumb around the neck and fret the first fret on the low E sting, go for it. If not, just strum the four highest strings. The B Major Chord The basics: First finger on the A string, second fret and barre the D, G, and B stings in the fourth fret with your third (or second) finger. Don’t strum the lowest and highest strings. DON’T SWEAT the F and B major chords! It’s more important to gain momentum with the other five major chords. Plus, there is a little trick I will show you down the road with the F major chord and an easy substitution chord that will often suffice in a pinch. After you’ve got the A-G major chords going, practice your I-IV-V progressions in the keys of A, C, D, E, and G. Take a look at the list of songs you want to learn. Are any of these simple I-IV-V chord songs? If not, search “three chord songs” – you’ll find examples like “Sweet Home Alabama”, “Bad Moon Arisin’”, “Rockin’ Robin”, “Brow-eyed Girl”, Margaretville”, “Twist and Shout, and “Old Time Rock and Roll”. Even if they aren’t your favorite songs, create pdfs of the lyrics and drop them into your lyric app. Consider these “training wheel” songs – they’ll get you going and create some momentum for you. Now about your singing . . . . let’s talk a bit about that in “So You Want To Play Guitar: Third Steps”  First Steps
This is going to be fun! And even if you are already on the guitar/singing path, there might be a few nuggets of info that will be of service to you. Supplies you will need: GUITAR A guitar (approx. $350 to 500) with a case. If you’ve never bought a guitar, look at my posts on buying a guitar. Start with a sturdy, well made acoustic/electric - with a strap. If you’re just starting out and your hands are on the smaller side of things, look for a guitar with a more narrow neck. Extra Strings – light or medium light phosphorous bronze sets. Down the road, we’ll explore buying strings in bulk but for now, buy full sets. A string winder An assortment of picks – more of them on the thin to medium side of things. MICROPHONE A mic – A Shure SM58 is what you need. Get one that DOESN’T have and on/off switch – they only break. Make sure the mic clip is in the mic pouch when you buy it. A boom mic stand – You’ll probably have to make two purchases: a straight-up mic stand with a round weighted base and a boom stand accessory. A 20’ XLR mic cable. We’ll talk amplification later. MUSIC A music stand – not a folding chrome stand but rather a black collapsible stand A larger size iPad/tablet. It doesn’t need to be the latest and greatest – just something with decent memory and screen size where you can read lyrics off a music stand. An app to manage all your pdf song lyrics. Create pdfs of all of these lyrics. VOICE Begin singing the songs you want to learn on guitar. Start singing them a cappella in the car, shower, on walks, etc. Use lyric pdfs if you need to. Tape yourself and evaluate your singing. Create a pdf of ALL the songs you want to learn to play and sing and start getting familiar with the lyrics. Make a note of what key you naturally lean to when singing them a cappella. Second steps will be in my next post.  So you want to play guitar.
And you are a music educator - or are studying to become one? Let me ask you a few questions. Who are your five favorite guitarists? Name five guitarists you would like to sound like when you play. How many of those last five guitarists also use the guitar to accompany their singing? On a scale of one to ten, what would you rate your current level of singing? On a scale of one to ten, what would you rate your current level of guitar playing? Fill in the numbers: So you are a “Sings___, plays ____.” Considering the last two questions, where is your current strength; playing guitar or singing? Record yourself singing several of your songs a cappella. After listening to your recording, do you want to revise that number? The dirty little secret is that your singing will ALWAYS have to be stronger than your guitar playing. Some practice strategies in my next post. “Sign on a high school bulletin board in Dallas: Free every Monday through Friday: knowledge. Bring your own containers.” – E.C. McKenzie   Brain breaks.
I know, they are in fashion. I didn’t do brain breaks. I just did breaks. I wasn’t going to tell them how to relax. I’d slap that magnet on the chalk board from the S to the G and walk way. No need to say “Break time”. The magnet said it all. If the kids listened closely to my muttering as I walked away from the board, they might have heard me say, “Smoke ‘em if you got ‘em”. Totally inappropriate, I know. But I laughed to myself as they would immediately cluster up and whisper to one another. In ninety seconds, I would slap that magnet back to the S like I was an obstetrician smacking a newborn baby’s bottom for an APGAR assessment. And they would come back focused and ready for more music. Kids need breaks. Period. Everything they experience doesn’t need to pass through the teacher’s ureter. Work ‘em hard. Then . . . . Let them talk. Let them play. Let them ask you a question or tell you a joke. A little “rock, paper, scizzors”. Give them a real break. What if it were you? Imagine a professional day presentation. Your ninety minutes into it, trying to look engaged when all you want is to get another cup of coffee. You need to hit the head and make a quick phone call to your real estate agent and know a break is imminent. The presenter say, “OK, we’ve been at it for ninety minutes so lets take a break . . . . . a BRAIN break! So . . .” Imagine how ticked off you would be. Don’t try to continuously dictate your students’ joy and intellectual curiosity. Let the kids have a real break. 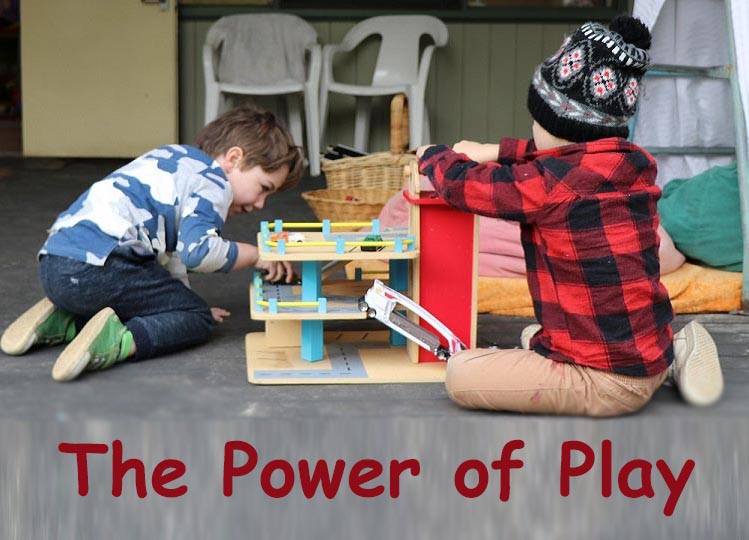 Teaching elementary music?
Want a tip that will inform you about the minds and habits of children? Stay out of the way and watch them play. At recess, on the playground, in the art room, with simple instruments, in the kindergarten or pre-K room. See how they interact, how they get along with each other, how they use their fingers, how they spontaneously interact or sing. Take note of their vocabulary and how you can take it to the next place. What makes them smile or laugh? When are they loud? When do they whisper? When do they pause . . . . and think? The smartest thing you can do before you plan a lesson is know where your students are. Only then can you plot how to take them further down the road. Playing will show you exactly where your students are. They are most dynamic when engaged in play and social interaction. Capitalize on that. And if you play your cards right, they might even invite you to play music with them. |
AuthorBoyd Holmes, the Writer Archives
June 2025
Categories |
 RSS Feed